Ultimate Discord Server Guide for Twitch Streamers
Discord is the most used voice chat program that streamers and gamers use these days. In this ultimate discord server guide for Twitch streamers you learn how to set up discord nicely! Oh, i still remember the times when you had to buy and set up Teamspeak servers or such to talk in streams and games with fellow community members. You couldn’t do text and images there either.
Did you know there actually was a time when people were posting links and they HAD TO go and see the images on different platforms?
- Why should you use Discord?
- How to create a new Discord Server
- How to add text channels for Discord Server
- How to add Voice Channels in Discord
- Moderator and Admin chat
- Organize the Discord server with Categories
- How to get – Emojis for Discord Channel names
- How to setup roles for your Discord
- Moderator roles and permissions for Discord server
- Member roles and permissions
- Extra permissions for Moderators and Admins
- How to Add Mee6 – Discord Bot
- Music Bot Rhythm for your Discord Server
- Notifications for Going live and New YouTube videos
- Now Live Bot for YouTube streamers
Why should you use Discord?
Thank god, Discord came for the rescue! Discord also has integrations for streamers so if you are affiliated or partnered you can get your emotes showing up on Discord. Your subscribers can also use those! Pretty cool huh? 🙂
Discord has also created the ability for you to add Discord Server specific emojis so you are not limited by the amount of your subscriber count with emojis.
On this video you discord server guide you learn how to setup your very own Discord server for your streaming community where you can chat with your friends and viewers. Discord is also free! Video is made by Gehsture and he covers really well everything you need to know about Discord for streamer usage.
For example: how to create discord server, how to assigning roles for users, how to color code users, how to add text channels and how to add voice channels for your discord server.
[elementor-template id=”10226″]Ultimate Guide to Making the Best Discord Server
Credits and +1 rep: For Gehsture about the awesome video!
Suggested read: If you want to check out even more in-depth guide about mee6 discord bot this guide is perfect for you!
Video Transcript
So you’ve clicked on this video because you want to know how to make a cool looking Discord server that people are going to enjoy and have a good time in, right? And it’s going to look really cool and clean, so I’m going to try not to bore you guys with a super long intro. It should be pretty cool, so I hope you guys enjoy. Let’s get going.
Yo guys, before the video starts, if you’re a Fortnite player and want to show some support to the channel, be sure to head over to the item shop, click ‘Support A Creator’ in the bottom right corner, type in ‘Gehsture’, and click ‘Accept’, and you might be featured in a video, just like these guys you’re about to see on the screen now. Thank you guys. I hope you enjoy the video. Peace.
How to create a new Discord Server

All right, so the first thing you’re going to want to do is you’re going to want to click this plus down here. That’s going to open up the server thing. You’re going to create a new server, right? So we’re going to name the server ‘Test Server 2 … 1’, I don’t know why I did 2. ‘Test server 1;, right?
So if you want to go and add an icon for it, you can click right there, add your icon. For this sake, let’s just go ahead and add one of my logos right there. Cool, right there. Hit create. Awesome, so now we have our … okay, so it’s asking you to invite. Just get rid of that.
All right, leave that voice channel. So now you’re in here, right? Boom. So what do you want to do? Well first things first, I like to go ahead and add some channels, so I’m going to theme this server more towards gaming, but, I mean, you can go off the same concept I’m going off of with any themed server that you’re trying to do.
How to add text channels for Discord Server

So you want to add a few text channels first. First ones I’m going to add are some moderating and admin channels, so you can add a mod chat, you can add an admin chat. Basically these are just going to be for here, this one’s going to be for your mods and admins, this is going to be only for your admins.
We’ll get into all that stuff later. We’re going to add updates tabs, so you can put all your updates in there. We’re going to add a live streams tab, so you can link all your live streams. We’re also going to add a videos tab, so you can link all your videos, right?
If I’m going too fast, I’m sorry, but like I said this is the basics that I did cover in my previous video. I just want to go over it again. It’s just going to be like an all-in-one tutorial video, basically. So we’re going to have a welcome channel as well. It’s going to welcome new members. We want to have a rules channel. Definitely want to have rules.
How to add Voice Channels in Discord

Now I can add some voice channels. Basically, you can have … I like to name one just a chill chat, basically, where people can go, hang out. There’s not really a main topic of the voice chat. We’ll drag this down here, though, to voice channels category. Let’s add another voice channel. This one will be our music channel, so let’s add the music channel here.
Click this plus button again, and we’re going to add another …
Moderator and Admin chat
We’re going to add a mod chat, and we can also add an admin chat. So basically, these two chats are going to allow you to have … maybe if you need … this is really helpful for big servers, if you need to have private meetings with your mods, or admins or something. You can use these voice channels, and set it up to where only your mods and admins can join those channels, which I will show you guys how to do once we get to that point.
Organize the Discord server with Categories

So we’ve got to do some channel setup, so let’s go ahead, before we jump into the roles, let’s go ahead and create some categories for your channel, because it’s all cluttered right here, so let’s kind of organize it real quick. So we’re going to click up here, we’re going to click on create category. You’re going to create a category.
[elementor-template id=”4813″]
This one, I like to name it, basically whatever your alias is, so I’m going to put Gehsture for mine, and that’s going to put this category down here, and basically, I’m going to drag everything that deals directly with me into there, so all of my live streams will be there, all of my videos will be there, as well as any updates that I want to give to my community will be found there as well.
And that’s pretty much all we want to put in there. Now, I also want to make an info channel, so basically what’s going to go in the info channel is not much. I’m going to put the rules there, I’m going to put the welcome chat there. We’ll also add one more channel that I forgot. You can either name it media dump, or you can name it … like if you want one for memes, you can do the meme chat.
How to get – Emojis for Discord Channel names

You name it whatever you want. You can put a meme chat in there. I have one on my server; it’s pretty cool. And last but not least, to kind of spice things up a little bit more, what I always like to do at least, I like to add emoji’s in on each of the chat names. It kind of just makes it look a little bit more organized.
I don’t know, it adds a little bit of pop to it, and color. So the easiest way to do that though, if you have a mobile device, is to head over to your mobile device and access all of that, because you can just pull up your emoji keyboard on your phone. If you’re your PC, it’s a little bit harder.
You’ve got to go copy the emoji from somewhere, paste it, so we’re going to head over to the mobile device, we’re going to add some emojis in real quick, and then we’ll be right back.
Pro Tip: For PC users emojipedia is really good to get those easy copy / paste emojis.
All right, so just like that we’re back, and we’ve got some emojis on all of the channels that we made, and it just kind of makes it look a little bit cleaner and organized. You don’t have to do that, that’s just something that I like to do on my … I have it done on my server.
I don’t have every one of them done, but it just kind of makes it look a little bit more organized and whatnot, so feel free to do that if you want. If not, all good. All right, let’s jump into the part that’s a little more confusing. We’re going to jump into roles, right?
How to setup roles for your Discord

So roles are the backbone of the server. I’ve updated mine a lot from the last video I made, if you guys watched that video. I have a ton more roles in here, and I’ve updated a lot of them differently, so instead of going through all mine, that would take too long, we’re just going to go and jump right in to this. I’m going to explain them all again.
So we’re going to start off with the owner role. This is going to be your role. On every single role that you make, you want to make sure that you check display role separately from all my members, and allow anyone to @ mention this role. You don’t have to check this one, but you definitely check this one.
If you don’t check that one, then it’s only going to show everyone as online over here, so make sure you check that one on every single role you make right there. For this one, we just want to give the admin permission, that’s going to give every single permission down the line, and you’re going to go … we can set a custom color. I like to use a pinkish color. Pink’s my favorite color.
But you can use whatever your favorite color is, because this is going to be your role that only you will have, so let’s just go with that greenish, aqua, turquoisey foam color, I guess? And let’s move on. So now we have moderator, we have admin. You want to make a role for your bots. We are going to go over bots in this video as well, guys.
Bots, you want to make members, or I guess just name it member. So really, these are the only roles you need starting out. Once you start building your server a little more, and getting some people in there, you’ll want to add some cool roles. I have a lot of random roles, like YouTube members for everyone that’s become a member on my YouTube channel, all of my IRL friends, all my close friends and whatnot, they have this role.
I have this before 1k role; basically everyone that was in the Discord before I hit 1000 subs got that role. That’s a role that is never going to be given out again. So just kind of a cool thing to recognize all these people that were here. People love roles, so you definitely want to make a bunch, and just give them out to people if you think they deserve them or whatnot, you know?
But it’s your server. You can make whatever you want, add whatever you want, but I’m going to show you guys just the basic permissions you want for each of these basic roles here.
Moderator roles and permissions for Discord server
For moderator, you want to just probably separate it from all the members. You want to allow anyone to mention this role. You don’t want to give them the admin permission. You want the moderators to be able to view the audit log.
I don’t give them permission to manage the server. You want to give them permission to manage roles, manage channels, kick members, ban members, manage nicknames, we’ll need to change those. You can give them permission to manage emojis. I have it on my server, just so I have more people that can do it.
Sometimes you may not want moderators to be able to access your emojis, or to be able to add them and whatnot, so that maybe one you want to save only for your admins. In this case, I’m going to go and add it for moderators just because. Webhooks, I don’t use those, I don’t know anyone that does use those, so I’m just going to leave that off.
Manage messages, you want to give them the ability to delete messages and whatnot from other members. Mute members, deafen members, move members, and yeah, that’s basically all you want to give them, and you want to drag this under admin. Basically you want to set these up in the level of priority, so you’re going to be at the top, admin’s going to be the second on the list, moderators, so on and so forth.
So let’s jump over to our admin. So you want to display separately, allow them to @ mention anyone in this role, and you want to give them the admin permission. Now I will say, I didn’t do this on my last tutorial, because admin permission is, as you see, it’s a dangerous permission to grant.
Basically, anyone with that permission can do everything you can do, so it’s almost like they own the server. The only thing they can’t do is delete the server. I don’t give it out to my admins. Not because I don’t trust them, but just because, say someone accidentally got the admin role. I wouldn’t want them going in and changing the name of the server, changing the picture of the server, stuff like that.
That’s really the only thing that they can not do, but keep that in mind guys. You can scroll through each of these, and give each person … you might want to give your moderators less permissions than I gave the moderators on this one. It’s all up to you, but make sure if you’re giving out the administrator role, whoever you give this role to, you have 100% trust in, because they can do every single thing you can do, besides delete the server.
Member roles and permissions
So moving onto the members. You want to display separately, allow anyone to mention in the role. You don’t want to give them any other permissions. Just save your changes, set a color for them, and you’re good to go. I didn’t even set colors for the mod or the admin.
Let’s give the admin an orange, reddish color. I don’t know. Let’s give the admin a reddish color. All right, so onto the bots. Yellow, we’ll just do yellow for them. Display separately, allow them to mention the role, and you don’t want to give them any other permission besides that one.
So other than that, those are your basic roles that you want, so now that all the roles are set up, we’re good to start diving into the bots. We’re going to get some bots in the server, right? Well first, you want to give yourself roles. I gave myself every role in the server, so you want to just right click right here, roles, owner, admin, moderator, member, bots.
So now that we are in the owner role, we’re going to go modify some of these channels over here, for our mods and admins. So we want to edit the channel right here. We’re going to go to permissions, so we’re going to come over here and add a permission for admins, and add a permission for mods. We’re going to give mods and admins the ability to do everything here. Send messages. Save changes.
Extra permissions for Moderators and Admins
We’re also going to do the same for admin, give them ability to do everything in this chat. All right, but the kicker here is we’re going to come to @ everyone. So what this is going to do, is this is everyone besides these two roles. You want to remove access from everything. You don’t want them to see any of the messages in there, and whatnot.
So save changes on that, so now you will see that the mod chat has this little lock icon on it, meaning that it’s a locked channel, so the only people that are going to be able to access it are people that you’ve given permission to, which is yourself, your admins and your moderators, so that’s pretty cool.
And you want to come over here and do the same thing for here. Admin chat, add a role except this time, you’re only going to add your admin. Give them the ability to do everything to this channel, and then after you do that, you’re going to come over here to everyone, and remove everything. Again, this is going to give only you and your admins access to this chat.
So now, you want to do the same thing for the mod chat in the voice channels. So come in here to your mod voice chat permissions, remove this from everyone, and now you’re going to add a permission for your owners … I’m sorry, your admins, and your mods. You’re going to give them access to everything in this chat.
You’re going to do the same for your admins. You want to give your admins access to everything in the chat. Awesome. So now that you’ve done that, you also have a lock on … oh, that one didn’t give us a lock, I wonder why.
Why did we not get a lock on this one? Oh, shoot. Okay, so now you’re going to come to your admin chat over here, and do the same thing you just did for your mod chat. You’re going to remove access for everyone, save changes, and you’re going to add a permission for your admins, and give them permissions to everything. Save changes.
So now you have a lock on your mod chat, a lock on your admin chat. The admin chat, only your owner, which is you, and your admins can join it. Your mod chat, we set it up so that you, your admins and your mods can join it and no one else. Now you’re probably wondering, well, how the heck am I going to give everyone that joins the member role?
How to Add Mee6 – Discord Bot
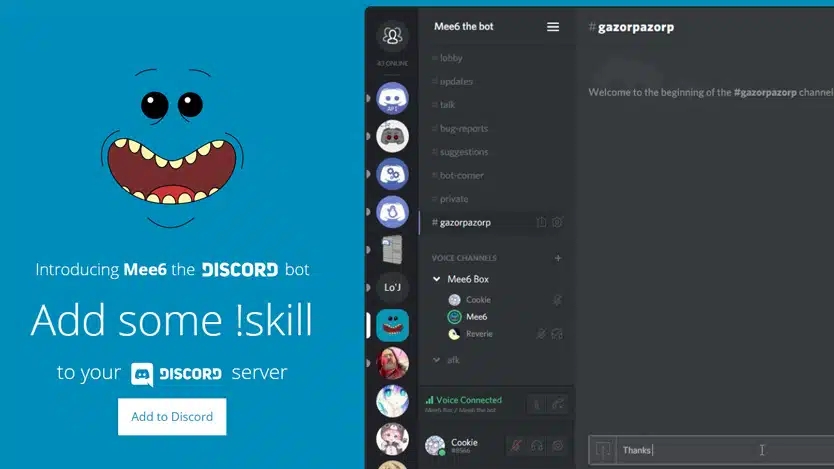
Well good news for you. There’s actually something that will do that for you. If you come over to Google, type in Mee 6, you will come to your server. Let me log out of mine. Let’s log in. We want to authorize the mee6 bot we want to add it to the right server. Oh, okay, here we go. So select a server. After you sign in with all your information, we’re going to select a server.
This is going to be our test server 1. This is saying this is all the permissions. You want to give this bot permissions to everything. Click authorize, you’re not a robot, of course. Awesome. So we are now going to go to your settings this is the Mee6 dashboard.
So what you can do is come over here to welcome. There’s a welcome plugin. You can have the bot send a message to a user when they join. I would definitely click that. It’s kind of just a nice warm welcome message. You want to select a channel, so this is why we made the welcome channel, right?
So we’re going to select a channel that the message is going to send to. We want the welcome channel. It’s going to say, “Hey.” That’s the user, “Welcome to the server.” And then we’re going to add, “Be sure to read the,” and we’re going to put, “#rules,” and that’s going to link us to this rules chat, right there. “#rules, and hope you enjoy your stay.”
Awesome. So we’re going to save those changes, so now any time someone joins, it’s going to say, “Hey,” and it’s going to say the username, and, “Welcome to the server,” in this case, test server 1, “Be sure to read the rules, and I hope you enjoy your stay.”
So the reason we did #rules is because it’ll actually drop a link. If you notice on Discord, when you type, say, #rules, and enter, it’ll drop a link like this, and you can click it, it takes you straight to the rules tab, so that’s pretty cool.
So we also want to give a new role to the users. This is what I was telling you guys about, where you don’t have to worry about adding roles to people when they join. You’re going to click on add a role to give. You want to give all new members a member role, and when you do that, you’re going to get an error saying it looks like I can’t get one of these roles listed. Put Me 6 above all other roles.
So you’re going to come over to your Discord, you’re going to go into your server settings, you’re going to come to your roles, you’re going to come to your Mee6 bot. What this is saying is that it wants the Mee6 bot wants to be above whatever it’s controlling. So we’re going to put it above everything. I mean, if you want to put it above everything but you, you can. If you just want to say that you’re more powerful than the bot, but in this case, I’m putting it over everything, so I can update stuff for you too if you want.
Save changes. Minimize, now it’s not giving us the error anymore, we’re good to go. So every time someone joins the server, it’s going to automatically put them in the member role. If you want, you can set up the bot to send a private message to new users when they join the server, and you can also have it send a message to your server when a user leaves.
So if you’re wanting to track how many people are leaving your server, you can set that up if you want. I’m not going to set that up for the time being, but that is something you can do.
So we have another super cool plugin right here, the levels plugin. Now what I have heard, is that if you are new to Discord. Or if you’re new to Mee6 and you have not been using this bot since they changed the feature, you’re not going to have access to it’s going to be under the premium tab for you.
However, since I was using Mee6 before they made the levels feature a premium feature, I am able to have access to it, and not have to pay for it. But for you guys, you guys won’t have this feature, so I’m not really going to go in depth on it, but I did just want to kind of touch base on that, because a lot of people were asking on comments on my previous video, that they’re not able to do the levels feature. Well, it is because they actually made it a premium feature, and you’re not able to access it unless you were already using it, so we’re not going to worry about that.
Music Bot Rhythm for your Discord Server

We’re going to move on to the music bot that I use. So the music bot I use is Rhythm. By the way, I’ll drop all these links in the description, but you want to come over here to invite Rhythm, and you’re going to select the server you want to invite it to.
We’re doing test server 1, and we’re going to click authorize. We’re going to say we’re not a robot, of course. Boom. So this is going to kind of give us a test of our new things we just set up in Mee6, so the player joined. Rhythm was automatically put in the member role, and there was a message sent to Rhythm saying, “Hey, welcome to the server. Be sure to read the #rules.”
So they can click on this, and go read the rules. So now what we’re going to do is change the role of the Rhythm bot. We’re going to put it in the bot role, as well as Mee6, put it in the bot role, and we can remove the member role from Rhythm, just to get it under the bot role. So now you got your bots all in a nice, neat little category over there, so it’s not cluttered in with all the other people.
Notifications for Going live and New YouTube videos
So heading back over to Mee6, one of the really cool things you can do with your Mee6 bot, is you can set it up to notify when you go live on Twitch, as well as notify whenever you post a video on YouTube, so let’s set up the YouTube one.
We’re going to enable the plugin, we’re going to add a YouTube channel, so our youtube channel is going to be. Let’s just use mine right now, for example. So youtube.com/Gehsture. We’re going to pick that channel, and now you can select a channel that you want it to link your videos in, so that’s why we made the videos channel.
We’re going to click on videos, and we’re going to have it @ everyone. If you don’t want it to ping everyone, you can just take that out right there. @ everyone, just posted a video, go check it out. If you want to change this up, you can. Go check it out. Be sure to drop a like, and leave some feedback … oh shoot. Feedback in the comments section.
And we’re going to click add, so now anytime that I upload a video to this channel, and you can set this up for other YouTubers if you want, but in this case, I’m just going to do it for my channel. Any time I upload a video, it’s going to link the video to the videos tab on the server.
So now moving over to the Twitch one, you can also enable to plugin to link when you go live on Twitch. If you just link your Twitch. Twitch.tv/Gehsture. Give it a second, it’ll pop up your link … oh, it’s not popping up mine. Okay, so for this one, you don’t type in the URL, you’re just going to type in your twitch name, and we have Gehsture right there.
We’re going to link this one to the live stream section. “Hey everyone, a streamer is now live on link. Go check it out.” And just click add, and you’re good to go. It’s automatically going to link your Twitch stream.
Now Live Bot for YouTube streamers

Now if you’re a YouTube streamer, there is a Now Live bot you can use. The Now Live bot is going to link your YouTube stream, and it can also do Twitch and Mixer, but I use this one for my YouTube streams, so you can just add this to your test server, authorize, and basically what this is going to do is link your YouTube stream every time you go live. If you come in here, change the roles, add it as a bot.
There’s a little bit of setup you have to do, so if you do stream to YouTube, I will go through and set this up for you guys real quick, just to show you, but if you don’t stream to YouTube, you don’t want to worry about this. You may want to skip ahead about 60 seconds or so.
So coming over to the live streams tab, you’re going to see it says ‘dash in L help’, so we’re going to do ‘-inl help’. It’s going to tell us, “Hey there Gehsture. I hear you want to add a command.”
So we’re going to add a command. All right, so right here, you can use this command ‘in l YouTube Gaming help’, that’ll give you a list of all your YouTube gaming commands right here. So basically, it’s easiest just to copy this one. You’re going to want to add your YouTube Gaming channel.
Now what you have to do, that this is not your channel URL. What you’re going to want to do is come over to gaming.youtube.com, and you’re going to search your channel on here, just search Gehsture. Let’s see if we can find us, there we are right here.
Now you’re going to copy just this right here. Everything after ‘channel’, and you’re going to come over to Discord, and you’re going to paste the URL … or not the URL, but the ID, and you’re going to go, added channels, Gehsture, they will be announced in general.
Now if you want to change where it’s going to send that message, you want to do ‘in l config’. It’s going to give you all these commands right here. You’re going to want to use this one; set default announce channel. Okay, so this is the command you’re going to want to use.
You’re going to want to type this in real quick. ‘In l config set default announce channel’, and then you’re going to want to link the channel right here, so we’re going to do live streams, hit enter, and boom. Our default announcement channel is now set to live streams.
So that is that. Easy as that. It’s now going to link your YouTube stream right in here. So that’s going to be it, guys. If you do need any help or have any questions, I’ve gotten pretty good at Discord over the past year or so, so I always reply. I reply to pretty much every single comment, so drop a comment below.
Let me know what questions you have. Feel free to join my Discord if you want to check it out for yourself, get a look around, and if you want to use the rules that I have set up for your server, you can feel free to do so. Just come on over and join in the server. The link is in the description, and yeah, I hope this helped you guys.
Like I said, if you have any questions, be sure to drop a comment. So if you guys did enjoy, be sure to like, and if you really enjoyed, consider hitting that subscribe button. I do daily streams. I stream a lot of different games, so I’m sure there’s something you guys would find entertaining.
I suck really bad, so you guys will probably find that entertaining. But other than that, I’ll catch you guys in the next one. I love you all, peace.


